Creating that deep, mirror-like piano black look on a piece of furniture is the holy grail of finishing. Whether you are building high-end speaker enclosures, custom cabinets, or sleek modern tables, a high gloss black finish screams luxury. However, achieving this level of perfection on MDF (Medium Density Fiberboard) can be tricky. It requires patience, the right technique, and a lot of elbow grease.
As a manufacturer of wood-based panels here in China, I, Allen, see thousands of sheets of MDF leave my factory every week. I know exactly how this material behaves. I’ve worked with clients like Mark Thompson in the USA who demand perfection for their furniture lines. This guide is worth reading because I’m going to walk you through the exact process—from prep to polish—to transform a fuzzy piece of fiberboard into a glass-like masterpiece. We will look at why preparation is everything, which paint system works best, and the secrets to that final showroom shine.
Why is MDF the Best Material for a High-Gloss Finish?
You might wonder why we use MDF instead of solid wood for high-gloss projects. The answer lies in stability and texture. Solid wood has a natural grain pattern. Even with heavy filling and sanding, that grain can eventually telegraph through the finish as the wood expands and contracts with humidity.
Medium density fiberboard, on the other hand, is an engineered product. It has no grain. It is dimensionally stable, meaning it won’t warp or crack as easily as solid wood. This provides the perfectly flat, stable canvas required for a high-gloss finish on mdf. Any tiny movement in the substrate will ruin the reflection of a gloss finish, making MDF the superior choice for that "liquid" look. Whether you are making a speaker box or a kitchen door, the smooth surface of high-quality Custom Raw Plain MDF Board 0.8mm-25mm is your best starting point.
What is the First Step to Prepare for a High-Gloss Finish on MDF?
The process begins long before you open a can of paint. The first step is inspection and preparation. Even though MDF is smooth, it often has a wax coating from the manufacturing process, and the cut edges are porous and rough.
Start by cleaning the sheet to remove any surface dirt or oils. Then, you must sand the entire surface. Use 120 to 180 grit sandpaper on a sanding block or orbital sander. The goal here isn’t to remove material, but to scuff the surface so the primer can stick, and to level out any manufacturing defects.
Pay special attention to the edges. If you have routed edges or saw cuts, they will feel fuzzy. You need to sand these down until they feel as smooth as the face of the board. If you skip this prep, your high-gloss finish on mdf will look uneven and amateur.
How Do You Seal and Prime MDF for a Smooth Finish?
MDF acts like a sponge. If you apply your topcoat directly to the raw board, it will soak in unevenly, leaving dull spots. You must seal the board first.
Use a high-build primer or a specific MDF sealer. A solvent-based primer (like shellac or an automotive surfacing primer) is often better than water-based ones because it doesn’t raise the fibers as much.
- Apply a heavy coat of primer, focusing on the edges.
- Let it cure completely.
- Sand the primed surface with 320 grit paper.
- Repeat.
You might need 2 or 3 coats of primer to get a perfectly flat surface. You know you are ready for paint when the board looks uniform and feels silky smooth to the touch. If you can still see the texture of the board through the primer, you are not ready to move on. This foundation is what makes the finish pop.
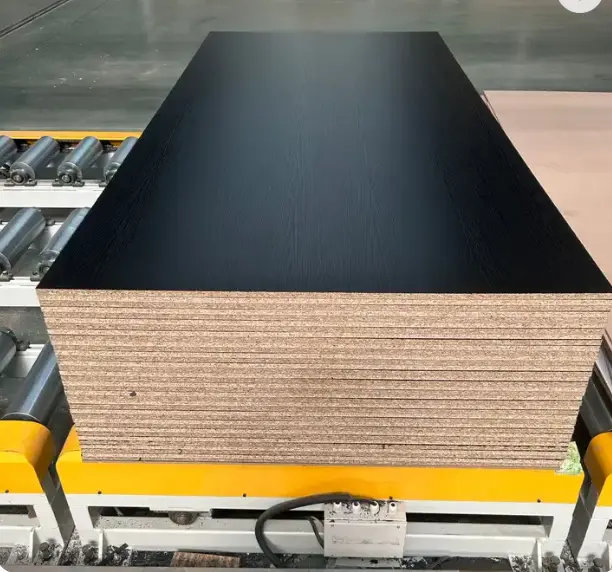
Why is Sanding Between Coats Crucial for a Gloss Finish?
Here is the secret that separates a "good" finish from a "mirror" finish: blocking and sanding. A gloss finish highlights every single imperfection. Every bump, every piece of dust, and every brush mark will show up.
To eliminate these, you must sand between every single coat of primer and paint. This flattens the surface. When you spray a coat of paint, it lands with a slight texture, often called "orange peel" because it looks like the skin of an orange. If you apply another coat on top, you just bury that texture.
By sanding with fine sandpaper (moving from 320 to 400 to 600 grit as you progress), you cut the tops off those tiny bumps, creating a perfectly flat plane. When light hits a flat plane, it reflects directly back to your eye, creating that high sheen. Always use a sanding block to ensure you aren’t digging holes with your fingers.
Which Paint System is Best: Lacquer, Enamel, or Polyester?
Choosing the right paint is critical for a black finish on mdf. Here is a breakdown of the common options:
| Paint Type | Pros | Cons | Best For |
|---|---|---|---|
| Lacquer | Dries very fast, easy to buff, easy to repair. | Can be brittle, thinner coats required. | Furniture, Cabinets |
| Enamel | Very hard, durable surface. | Takes a long time to cure, harder to buff. | Heavy-use surfaces |
| Polyurethane | Extremely durable, deep gloss, chemical resistant. | Tricky mixing ratios (2-part), toxic fumes. | Tables, Bars |
| Polyester | The ultimate piano black. Incredible depth and build. | Very expensive, difficult to apply, requires professional gear. | High-end Pianos, Luxury Speakers |
For most DIYers and small shops, a high-quality acrylic lacquer or a 2K urethane (automotive clear coat) is the best balance of ease and results. Polyester is the industry standard for true piano black, as the high solid content builds a thick glass-like layer, but it requires strict climate control.
Can You Achieve a High-Gloss Finish with a Brush or Roller?
I will be honest with you: achieving a true, flawless high-gloss finish with a brush or roller is nearly impossible. Even with the best self-leveling additives, a brush or roller will leave microscopic texture marks. In a satin or matte finish, these are invisible. In a gloss finish, they ruin the reflection.
To get that professional look, you really need to spray. You don’t necessarily need a $5,000 booth. A decent HVLP (High Volume Low Pressure) gun and a compressor will do the job. The spray gun atomizes the paint into tiny droplets that merge together on the surface to form a smooth sheet of color.
If you don’t have a compressor, you can get decent results with high-quality auto body spray cans (look for 2K aerosols that have a hardener button on the bottom). But for professional consistency, a spray gun is the only way to go.
What is the Step-by-Step Technique for a Piano Black Finish?
Okay, let’s get to the core technique. You have primed and blocked your MDF. It is dead flat. Now, you want that deep black finish.
- Clean: Wipe the piece with a tack cloth to remove every speck of dust.
- Base Coat: Spray your black base coat. This provides the color pigment. Apply 2-3 thin coats. Do not try to get full coverage in one pass. Let it dry.
- Sand: Lightly wet sand with 600 grit to remove any dust nibs.
- Clear Coat: This is where the depth comes from. Apply a high-quality clear lacquer or urethane. This adds the "lens" over the black color.
- Build: You need depth. Apply multiple coats of clear (often 4 to 6 coats), allowing flash time between them. The clear coat protects the black finish on mdf and gives you enough material to buff later without burning through to the color.
Keep your stroke steady and overlap each pass by 50% to ensure an even film.
How Do You Polish and Buff to Get that Mirror Look?
After your final clear coat has cured (this could take days depending on the resin), the finish will look glossy, but it won’t be a mirror yet. It will likely have some texture. To get the "piano" look, you have to cut and buff.
This is the polishing stage:
- Wet Sanding: Start wet sanding the clear coat with 1000 grit sandpaper. Keep the paper wet to lubricate it. Sand until the surface is completely dull and flat. No shiny spots should remain (shiny spots mean dips in the finish).
- Refine: Move to 1500 grit, then 2000 grit, and finally 3000 grit. The surface should look smooth but hazy.
- Compound: Use a rotary buffer with a wool pad and a heavy-cut rubbing compound. This removes the sanding scratches.
- Polish: Switch to a foam pad and a fine finishing polish. This brings out the deep, wet-look shine.
This process is labor-intensive, but it is the only way to achieve a flawless reflection where you can see the pores of your skin in the reflection of the board.
How Do You Deal with Dust and Imperfections During the Process?
Dust is your absolute enemy. A single particle of dust landing on wet lacquer will look like a boulder in the finished product.
To combat this:
- Create a Clean Space: Do not sand in the same room where you spray. Set up a makeshift booth using plastic sheeting.
- Wet the Floor: Before spraying, spray water on the floor of your booth. This traps dust and prevents it from kicking up as you walk.
- Wear a Suit: Wear a Tyvek suit so lint from your clothes doesn’t fall onto the work.
- Air Filtration: Use air filters on your compressor line to ensure no oil or water gets into the gun.
If a bug lands in the paint or a big dust mark appears, don’t touch it while it’s wet! Let it dry, sand it out, and re-coat.
Is There an Easier Way to Get a High-Gloss Finish on MDF?
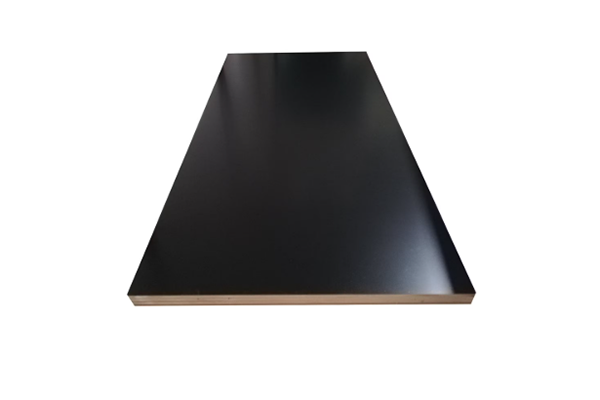
If reading all those steps makes you tired, I have good news. For business owners like Mark who need high volume and consistency without the labor cost of a paint booth, there is an alternative: Pre-finished Boards.
At our factory, we produce Factory High-Quality Melamine Mdf Board and PET laminated boards. We apply a high-gloss laminate or vinyl film directly to the MDF board using industrial rollers and presses.
- PET Film: This offers a near-perfect mirror finish that rivals automotive paint. It is extremely durable and scratch-resistant.
- High Gloss Melamine: A more affordable option that provides a shiny surface, though slightly less reflective than PET or piano black paint.
- Acrylic Sheets: We can laminate a thin sheet of high-gloss acrylic to the MDF, providing a glass-like depth instantly.
For cabinet doors and furniture panels, buying a pre-finished high-gloss finish on mdf board is often cheaper and faster than painting it yourself. You simply cut the board, edge band it with a matching glossy edge, and you are done.
Key Takeaways for a Mirror Finish
- Prep is King: A smoother finish starts with a perfectly sanded and sealed board. Don’t skimp on the primer.
- Seal the Edges: MDF edges soak up paint. Use a high-solid sealer to stop absorption.
- Spray, Don’t Brush: To avoid brush marks and achieve a professional look, use a spray gun.
- Sand Between Coats: You must level the surface after every coat to build a flat, reflective plane.
- The Magic is in the Buffing: The final mirror shine comes from wet sanding and polishing the clear coat, not just from the paint gun.
- Consider Alternatives: For B2B projects, pre-laminated high-gloss boards can save massive amounts of time and labor.
Post time: 11-20-2025