Laminated particle board is a versatile and cost-effective material widely used in furniture, cabinetry, and shelving. However, its layered structure, often featuring a delicate melamine or other laminate surface over a core of compressed wood particles, presents a challenge: cutting it cleanly without causing ugly chip-out or splintering along the cut edges. This guide dives deep into the best techniques, tools (saw types and blade choices), and preparation methods to help you achieve the perfect cut every time you need to cut laminated particle board. Whether you’re a large-scale furniture manufacturer like our typical customer Mark Thompson, a cabinet maker, or an interior designer specifying materials, mastering this skill is crucial for a professional finish. Read on to discover the secrets to flawless cutting laminated materials.
What Exactly is Laminated Particle Board and Why is Cutting It Tricky?
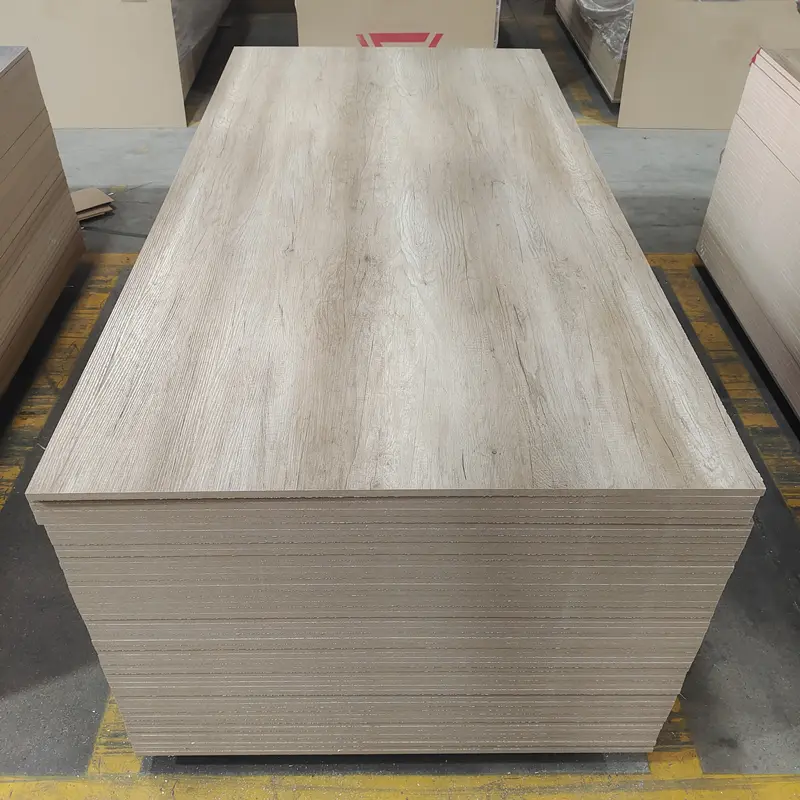
Laminated particle board, sometimes referred to simply as particle board or chipboard with a finish, is an engineered wood product. It’s manufactured by pressing wood chips, shavings, and sawdust together with a resin binder under heat and pressure. This core material is then typically covered on one or both sides with a thin layer of laminate, often melamine-impregnated paper featuring a specific color, pattern (like wood grain), or texture. This laminate surface provides durability, aesthetic appeal, and resistance to scratches and moisture. You’ll find various thicknesses, like those offered in our Factory Price Wood Grain Melamine MDF Board.
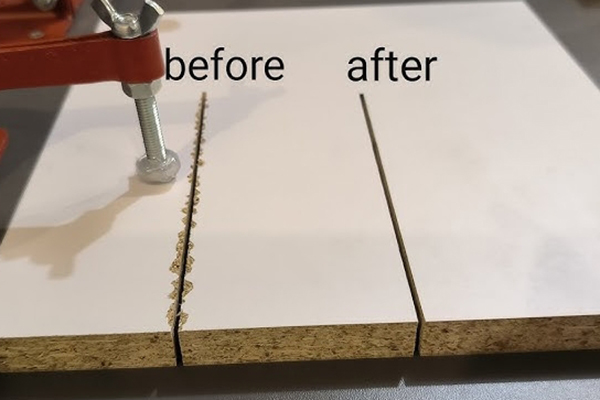
The challenge in cutting laminated particle board stems from this composite structure. The core particle board itself is prone to crumbling or breaking unevenly due to the nature of the compressed particles. More significantly, the hard, brittle laminate layer (especially melamine) is highly susceptible to chipping or cracking when subjected to the force of a standard saw blade. The cutting action of the saw teeth can lift and break small pieces of the laminate before the blade fully cuts through, resulting in an unsightly, ragged edge. This is particularly true when the saw blade teeth exit the material.
Understanding this interaction is the first step. The goal is to cleanly sever both the tough laminate and the softer particle board core simultaneously without causing damage to either. This requires careful selection of the type of saw and blade, proper technique, and sometimes, preparatory steps to support the laminate during the cut. Without the right approach, you risk ruining the appearance of the finished piece, leading to waste and increased production costs – a pain point we often hear about from procurement officers like Mark.
Why is Achieving a Clean Cut So Important for Laminated Particle Board?
A clean, chip-free cut isn’t just about aesthetics; it’s fundamental to the quality and functionality of the final product. When working with laminated particle board, the cut edges are often visible or form joints with other components. Ragged, chipped edges immediately signal poor craftsmanship and detract significantly from the overall appearance of furniture, cabinets, or fixtures. For businesses aiming for high-quality output, this is simply unacceptable.
Beyond looks, chipping can compromise the integrity of the edge. The laminate layer provides crucial protection against moisture ingress and wear. If this layer is chipped away at the edge, the underlying particle board core is exposed. Particle board is particularly susceptible to swelling and degradation if it absorbs moisture. A chipped edge creates a weak point where damage can easily start, potentially leading to the laminate peeling further or the core material deteriorating over time. This affects the durability and lifespan of the product.
Furthermore, chipped edges can interfere with assembly. If edge banding needs to be applied, a rough or uneven edge will prevent proper adhesion, leading to gaps or the banding coming loose later. Similarly, when joining panels, chipped edges can create misalignments or gaps, compromising the structural integrity and visual appeal of the joint. Achieving a clean cut ensures smooth assembly, tight joints, and a professional finish that meets customer expectations and industry standards. It reduces rework and material waste, ultimately impacting the bottom line.
What are the Best Tools to Cut Laminated Particle Board Without Chipping?
Choosing the right saw is paramount for achieving best results when cutting laminated particle board. While several types of saw can cut particle board, some are far better suited than others for preventing chip-out on the delicate laminate surface. The best tools generally offer stability, precise control, and the ability to use specialized blades.
- Table Saw: Often considered the gold standard for making straight cuts in sheet goods like laminated particle board. A table saw provides excellent stability for the workpiece and allows for precise control over the cut line. When equipped with the correct blade and techniques (like using a zero-clearance insert), it offers the best results for minimizing chipping, especially on the bottom side where the blade exits.
- Track Saw (Plunge Cut Saw): An excellent alternative to a table saw, especially for large panels or on-site work. A track saw runs along a guide rail, ensuring perfectly straight cuts. Its plunge action and enclosed blade design help control dust and, when used with the right blade, significantly reduce chipping on the top surface. Many professionals find a track saw provides results comparable to a table saw with added portability.
- Circular Saw: A common and versatile tool. While it can use to cut laminated particle board, achieving a chip-free cut requires more care and the right setup. Using a high-quality circular saw blade specifically designed for cutting laminate or fine finishes is essential. Techniques like scoring the cut line first and using a guide or straight edge are crucial. A circular saw tends to cause chipping on both sides if not used carefully, particularly on the top surface where the blade teeth are moving upwards as they exit the cut.
- Jigsaw: Generally not recommended for primary cutting of laminated particle board, especially for long, straight cuts. A jigsaw blade has an up-and-down cutting action that almost guarantees significant chipping on the top surface. It’s best reserved for curved cuts or small cutouts where other saws aren’t practical, and even then, specific techniques (like cutting from the back side or using masking tape) and specialized blades are needed to minimize damage. Using a jigsaw often yields results inferior to a circular saw or table saw.
A hand saw is generally unsuitable for achieving a clean, professional finish on laminated particle board due to the difficulty in maintaining a straight line and the high likelihood of causing significant chipping and splintering. The choice often depends on the type of cut, the volume of work, and the available equipment, but a table saw or track saw usually provides the most reliable way to cut.
Which Saw Blade Should You Use for the Cleanest Cut on Particle Board?
The single most critical factor in getting a clean cut on laminated particle board is the saw blade. Using a standard construction blade designed for rough framing or ripping solid wood is a recipe for disaster, resulting in severe chipping and splintering. You need a blade specifically designed for cutting laminate, melamine, plywood, or other fine-finish materials.
Here’s what to look for in a saw blade for laminated particle board:
- High Tooth Count: More teeth mean smaller "bites" per tooth, resulting in a smoother cut with less tear-out. For a 10-inch circular saw blade or table saw blade, look for 80-tooth blades or even higher (up to 100 teeth). For a 7-1/4 inch circular saw blade, aim for 60 teeth or more. A higher teeth per inch (TPI) count is key. Forget blades with 24 or 40 teeth; they are too aggressive. Aim for blades with at least 15 teeth per inch or more for the smoothest finish, though specific TPI counts vary with blade diameter.
- Tooth Geometry: The shape of the teeth matters. Look for blades with an Alternate Top Bevel (ATB) grind, or even better, a High Alternate Top Bevel (Hi-ATB) grind. The sharp, alternating points of Hi-ATB teeth shear the laminate surface cleanly before removing the material below, minimizing chip-out. Triple Chip Grind (TCG) blades, where a flat "raker" tooth is followed by a beveled "scoring" tooth, are also excellent designed for cutting laminate and melamine.
- Carbide Tips: Ensure the blade has high-quality carbide teeth. Carbide is much harder and holds an edge longer than steel, which is crucial when cutting abrasive materials like particle board and hard laminate. A sharp blade is essential; a dull blade will tear rather than cut cleanly. Look for blades with C3 or C4 grade carbide. Using a carbide blade is highly recommended.
- Negative Hook Angle: Some blades designed for cutting laminate feature a negative hook angle. This means the teeth angle slightly backward relative to the direction of rotation. This creates a less aggressive scraping or shearing action, reducing the tendency to lift and chip the fragile laminate surface, especially important for tools like sliding miter saws or radial arm saws, but also beneficial on table saws and circular saws.
Investing in a quality blade designed for cutting laminate materials is non-negotiable if you want professional results. Brands like Freud, Forrest, CMT, and Bosch offer excellent options. Remember, even the best tools perform poorly with the wrong blade.
How Do You Effectively Use a Circular Saw to Cut Laminated Particle Board?
While a table saw or track saw might offer slightly better results, a circular saw is a capable tool for cutting laminated particle board if used correctly. The main challenge when you use a circular saw is preventing chip-out on the top surface, as the blade teeth rotate upwards through the material as they exit the cut. Here are key tips and tricks:
- Use the Right Blade: This cannot be stressed enough. Equip your circular saw with a high-tooth-count (60T+ for 7-1/4") carbide-tipped blade designed for cutting laminate or fine finishes (Hi-ATB or TCG grind). Ensure the blade is sharp.
- Set Correct Blade Depth: Adjust the depth of the blade so it extends only slightly below the bottom of the particle board – perhaps 1/4 inch or less. A shallow blade depth reduces the upward force of the teeth as they exit the top surface, minimizing chipping.
- Score the Cut Line: This is a crucial step. Before making the main cut, make a very shallow preliminary cut (about 1/16 inch deep) exactly along your cut line. Use a utility knife or stanley knife with a straight edge, or make a shallow pass with the circular saw itself (sometimes called a "climb cut" if done in reverse, but this requires extreme caution). This score the laminate surface cleanly, creating a defined edge that helps prevent the main cut from chipping.
- Use Masking Tape: Apply wide, good-quality masking tape along the entire cut line on the top surface. Press it down firmly. Mark your cut line on the tape. The tape provides support to the fragile laminate fibers, helping to prevent them from lifting and chipping as the saw blade passes through. Use masking tape between the two marks if you scored first.
- Cut with the Good Side Down (Sometimes): Since a circular saw typically chips the top surface more, some suggest cutting with the finished side facing down. The upward motion of the blade teeth will then be entering the finished surface and exiting the unfinished back, potentially reducing visible chipping. However, this makes following the cut line harder and scoring less effective. Combining scoring and tape on the top side is often a better approach.
- Use a Straight Edge Guide: Clamp a straight edge (like a level, a dedicated saw guide, or a straight piece of plywood or MDF) parallel to your cut line for the saw to follow. This ensures a perfectly straight cut and allows you to focus on maintaining a steady feed rate, which also helps reduce chipping.
- Support the Material: Ensure the particle board sheet is fully supported on both sides of the panel and along its length during the cut to prevent vibration or sagging, which can lead to binding and rougher cuts. Using a sacrificial board underneath can also help support the fibers on the bottom side where the blade exits.
By combining these techniques – the right circular saw blade, proper blade depth, scoring, taping, using a guide, and ensuring good support – you can significantly improve the final result and achieve clean cuts with a circular saw.
Can a Table Saw Provide Better Results When Cutting Laminated Surfaces?
Yes, a table saw often provides better results than a jigsaw or even a carefully used circular saw when cutting laminated particle board, especially for repeated straight cuts. The inherent stability of a table saw and the downward rotation of the blade towards the table offer distinct advantages for minimizing chip-out on the visible (top) surface.
The primary reason is the direction of the blade‘s rotation relative to the workpiece. On a table saw, the teeth enter the top surface of the particle board moving downwards and exit through the bottom. This downward pressure helps hold the laminate fibers in place on the top surface, significantly reducing the tendency to chip or lift. Chipping, if it occurs, is more likely on the bottom surface, which is often less critical visually. Compare this to a circular saw, where the teeth exit upwards through the top surface, actively trying to lift the laminate.
To maximize the table saw‘s advantage:
- Use the Right Blade: As always, a high-tooth-count (80T or 100T for a 10" saw) carbide blade with a Hi-ATB or TCG grind is essential. Ensure it’s sharp.
- Zero-Clearance Insert (ZCI): Replace the standard throat plate on your table saw with a ZCI. This is a custom insert with a slot that is exactly the width of your saw blade. It provides complete support to the wood fibers right up to the edge of the blade on the bottom side of the cut, dramatically reducing chip-out on the exit side (bottom surface). You can easily make one from scrap MDF or plywood.
- Correct Blade Height: Set the blade height so the top of the teeth extends about 1/2 inch above the surface of the material. Some argue for lower heights to minimize chipping, while others prefer slightly higher for cleaner shearing; experiment to see what works best with your blade and material.
- Scoring: For absolutely critical cuts with zero tolerance for chipping (even on the bottom), you can employ two cuts. First, make a very shallow scoring cut (1/16" deep) along the cut line. Then, raise the blade to the full cutting height and make the final cut, perfectly aligned with the scoring cut. This ensures the laminate is cleanly severed on both sides of the panel before the main cut removes the material.
- Use Masking Tape: While less critical on the top surface with a table saw, applying masking tape can still provide extra insurance against minor chipping, especially on the bottom if not using a ZCI.
- Steady Feed Rate: Push the panel across the blade at a smooth, consistent, and relatively slow pace. Avoid forcing the material or stopping mid-cut.
Using a table saw with these techniques is often the most reliable way to cut laminated particle board cleanly and efficiently in a workshop setting.
Is a Jigsaw Suitable for Cutting Particle Board, Especially for Curves?
A jigsaw can use to cut particle board, but it’s generally the tool most likely to cause significant chipping on the laminate surface, particularly the top side. The reciprocating (up-and-down) motion of the thin jigsaw blade, combined with the upward stroke typically being the cutting stroke on most jigsaws, aggressively lifts and tears the laminate. Therefore, a jigsaw is usually the last resort for cutting laminated particle board.
However, a jigsaw is often the only practical type of saw for making curved cuts or internal cutouts (like sink openings). If you must cut with a jigsaw, take these precautions to minimize damage:
- Use the Right Blade: Choose a jigsaw blade specifically designed for cutting laminate or for fine, splinter-free cuts. These often have fine, numerous teeth (high TPI) and may be labeled as "clean cut" or "laminate" blades. Some jigsaw blade designs feature "down-cut" teeth, meaning the cutting action occurs on the downward stroke. This directs the cutting force downwards, reducing chip-out on the top surface but potentially increasing it on the bottom. Bosch makes several well-regarded laminate blades.
- Cut from the Back: If possible, mark your cut line on the back (unfinished) side of the particle board and make the cut from there. This way, the chipping caused by the upward cutting action occurs on the less visible back surface.
- Use Masking Tape: Apply masking tape firmly along the cut line on the top surface (or the surface facing up during the cut). This helps support the laminate fibers.
- Score the Line: Use a utility knife to deeply score the laminate along the cut line before using the jigsaw. This helps create a cleaner break.
- Zero-Clearance Base Plate: Some jigsaws allow for anti-splinter inserts or zero-clearance base plates that fit around the blade, supporting the fibers close to the cut. Use one if available.
- Adjust Settings: Use a slower blade speed and turn off the orbital action (pendulum stroke) if your jigsaw has it. Orbital action makes cuts faster but much rougher.
- Use a Sacrificial Board: Clamping a thin piece of scrap plywood or hardboard firmly to the top surface and cutting through both layers can help support the laminate and reduce chipping.
Even with these measures, expect some level of chipping when you cut with a jigsaw. It requires patience and careful technique. For critical curved cuts, consider using a router with a template and a spiral down-cut bit after making a rough cut with the jigsaw slightly inside the line – this often yields the best results for curves.
What Preparation Steps Can Minimize Chipping and Splintering?
Beyond choosing the right saw and blade, several preparation steps can significantly reduce chipping and splintering when cutting laminated particle board. These techniques focus on supporting the fragile laminate layer right at the cut line.
- Scoring the Cut Line: This is perhaps the most effective technique. Before making the main cut with your saw, use a sharp utility knife or stanley knife and a reliable straight edge to deeply score the laminate surface exactly where you want to cut. Make two or three firm passes with the knife, aiming to cut cleanly through the laminate layer itself. This creates a predefined breaking point, preventing the saw blade teeth from lifting and tearing the surrounding laminate. When making your saw cut, align the blade precisely with one side of the scored line (the waste side).
- Using Masking Tape: Applying wide (2-inch or wider) painter’s masking tape along the entire cut line provides physical support to the surface fibers. Press the tape down firmly to ensure good adhesion. You can draw a straight line directly onto the tape. While not foolproof on its own, masking tape significantly helps, especially when combined with scoring or a sharp, high-TPI blade. Use masking tape from one mark to the other, covering the path the saw will take. Apply tape between the two marks if you’ve scored the line first.
- Using a Sacrificial Board (Zero-Clearance Method): Place a piece of scrap material (like thin plywood, hardboard, or even another piece of particle board) firmly on top of or underneath the laminated particle board along the cut line. Clamp them together securely. Cut through both layers simultaneously. The sacrificial board supports the laminate fibers right at the edge of the cut, preventing them from being lifted or torn by the saw blade. Placing the sacrificial board on the exit side of the blade (top for a circular saw, bottom for a table saw without a ZCI) is most effective.
- Ensure Proper Support: Make sure the sheet of particle board is well-supported near the cut line on both sides. Use sawhorses with sacrificial tops, an outfeed table for a table saw, or foam insulation boards on the floor. Preventing vibration and sagging ensures the saw cuts smoothly without binding or flexing the material, which can worsen chipping.
Combining these methods offers the best defense against chipping. For instance, scoring the line and applying masking tape provides excellent protection for cuts made with a circular saw or jigsaw. Using a zero-clearance insert on a table saw acts like a permanent sacrificial board for the bottom side.
Are There Specific Techniques for Cutting Melamine Particle Board?
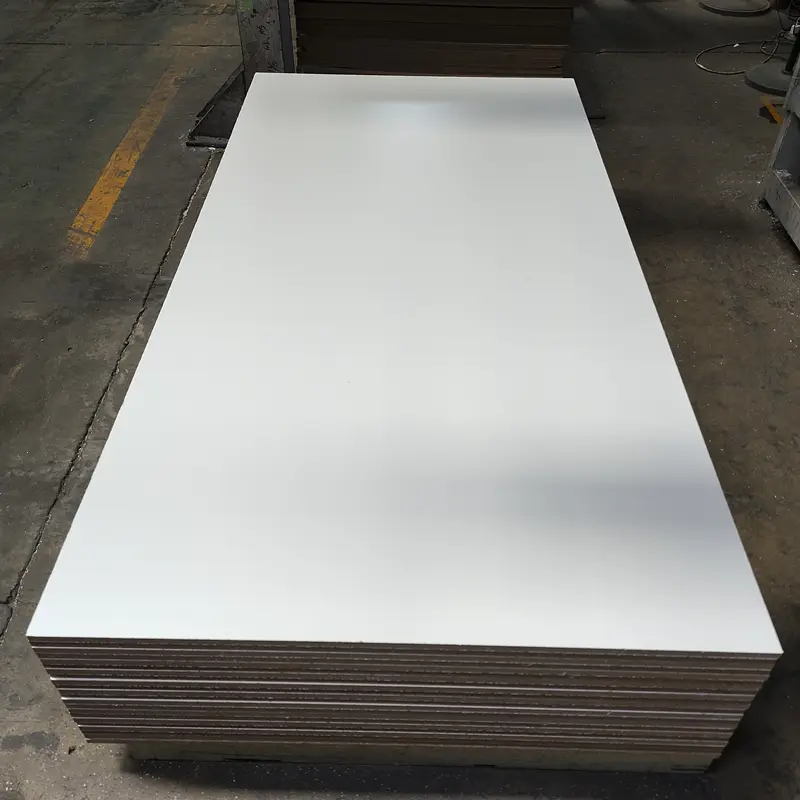
Melamine particle board is perhaps the most common type of laminated particle board, and its hard, brittle surface makes it notoriously prone to chipping. While the general techniques already discussed apply, here are some specific considerations for cutting laminated boards that are probably melamine:
- Blade Choice is Critical: A blade specifically designed for melamine or "non-chip" cutting is highly recommended. These are typically Hi-ATB or TCG grind blades with a high tooth count (80T+ for 10"). The sharpness and precise geometry of these blades are key to shearing the melamine cleanly. A standard plywood blade might not be sufficient for perfect results.
- Scoring is Essential: Due to its brittleness, scoring the cut line deeply with a utility knife or making a preliminary shallow pass with the saw blade (approx. 1/16" deep) is almost mandatory for achieving chip-free cuts in melamine, especially when using a circular saw. Cut precisely along the side of the scored line.
- Table Saw with ZCI: For straight cuts, a table saw equipped with a zero-clearance insert and the correct melamine blade generally yields the best results. The downward cutting pressure minimizes chipping on the visible top surface, and the ZCI supports the bottom surface.
- Track Saw Advantage: Track saws also excel with melamine. The guide rail ensures accuracy, and the plunge mechanism combined with the right blade often produces very clean cuts on the top of the piece. Many track saws have integrated splinter guards on the track edge that further help.
- Tape Can Help: High-adhesion painter’s tape can provide marginal improvement but is usually less effective on its own with melamine compared to softer laminates. Use it in conjunction with scoring or a top-quality blade.
- Feed Rate: Maintain a moderate, consistent feed rate. Pushing too fast can overwhelm the blade and increase chipping, while moving too slow can cause burning. Let the blade do the work.
Essentially, cutting melamine demands the most meticulous application of the best practices: the sharpest, highest-quality blade designed for cutting laminate, precise scoring, and stable support. Compromising on any of these steps significantly increases the risk of chipping this unforgiving material. As manufacturers ourselves, providing materials like our Melamine MDF board panel, we understand the importance of achieving clean cut edges.
Safety First: What Precautions Should You Take When Cutting Particle Board?
Working with power saws and particle board requires strict adherence to safety protocols. Particle board, especially MDF (Medium Density Fiberboard), produces fine dust containing formaldehyde resins, which can be harmful if inhaled. The cutting process itself poses risks of injury. Always prioritize safety:
- Eye Protection: Always wear safety glasses or, even better, a full face shield to protect your eyes from flying chips and fine dust. This is non-negotiable when operating any saw.
- Respiratory Protection: Wear a dust mask or respirator rated for fine particulates (like N95 or P100) to avoid inhaling the wood dust and formaldehyde released during cutting. This is crucial when cutting this stuff, especially in enclosed spaces. Good ventilation is also important.
- Hearing Protection: Power saws generate significant noise. Use earplugs or earmuffs to protect your hearing during prolonged operation.
- Hand Protection: Wear protective gloves not necessarily for the cutting itself (as gloves can sometimes get caught), but for handling the large, potentially sharp-edged sheets of particle board. Be extremely cautious keeping hands away from the blade path during operation.
- Secure the Workpiece: Ensure the particle board sheet is firmly clamped or supported so it cannot shift unexpectedly during the cut. Use push sticks or push blocks with a table saw to keep your hands away from the blade.
- Blade Guard: Always use the saw‘s blade guard. It’s there for a reason – to prevent accidental contact with the spinning blade. Ensure it’s functioning correctly.
- Disconnect Power: Before changing blades or making adjustments to the saw, always disconnect the power source to prevent accidental startup.
- Appropriate Clothing: Avoid loose clothing, dangling jewelry, or long hair that could get caught in the saw.
- Read the Manual: Familiarize yourself with your specific saw‘s operating instructions and safety recommendations.
Cutting laminated particle board safely requires focus and respect for the tools and materials. Don’t take shortcuts when it comes to safety procedures. Protecting yourself ensures you can continue to achieve a professional finish on your projects. For alternatives or different core materials, consider exploring options like our Custom Raw Plain MDF Board which requires similar safety precautions during processing.
Key Takeaways for Chip-Free Cutting:
Mastering the art of cutting laminated particle board without chipping boils down to a combination of the right tools, techniques, and preparation. Remember these crucial points:
- Blade is King: Use a sharp, high-tooth-count (60T+ for 7.25", 80T+ for 10") carbide blade designed for cutting laminate or melamine (Hi-ATB or TCG grind).
- Scoring Saves Surfaces: Deeply score the laminate along the cut line with a utility knife before sawing, especially with circular saws or jigsaws.
- Tape Adds Support: Apply wide masking tape along the cut line to help prevent fibers from lifting.
- Choose the Right Saw: A table saw (with ZCI) or track saw generally gives the best results for straight cuts. Use a circular saw carefully with proper setup. Reserve the jigsaw for curves and use specialized blades and techniques.
- Control the Cut: Set the correct blade depth (just below the material for circular saws). Use guides for straight cuts. Maintain a steady, appropriate feed rate.
- Support Your Work: Ensure the particle board is well-supported to prevent vibration and binding. Use a sacrificial board underneath if needed.
- Safety First: Always wear appropriate eye, respiratory, and hearing protection. Use all saw safety features and follow safe operating procedures.
By diligently applying these tips and tricks, you can consistently achieve clean, professional cut edges on laminated particle board, enhancing the quality and appearance of your finished products.
Post time: 04-15-2025