Wall panelling has made a huge comeback, and for good reason. It adds texture, character, and a touch of architectural elegance to any room. If you’re looking to elevate your home interior, you’ve likely come across various materials, but one stands out for its versatility and affordability: Medium Density Fiberboard, or MDF. As a manufacturer, I’m Allen, and my company specializes in producing high-quality wood-based panels that we ship worldwide. I work with professionals like Mark Thompson in the USA, who rely on consistent, high-grade materials for their furniture and construction projects. Mark knows that choosing the right panel is the first step to a flawless final product. This guide will give you that same insider knowledge, helping you understand if an MDF wall is the right choice for you and how to ensure your wall panelling project is a stunning success.
What is MDF and Why is it a Popular Choice for Wall Panelling?
Let’s start with the basics. MDF is an acronym for Medium Density Fiberboard, a type of engineered wood product. From my factory floor, I can tell you exactly how it’s made. The process is fascinating! It’s made by breaking down hardwood or softwood residuals into wood fibers. Think of it as recycling the leftovers from other lumber processes. These fine wood fibres are then combined with wax and a special resin binder. This mixture is formed into large mats, which we then compress under intense heat and pressure to create a strong, dense panel.
The result is a material that is incredibly consistent. Unlike natural wood, an MDF panel has no grain, knots, or voids. This gives it a perfectly uniform and smooth surface, which is a huge advantage for interior design. When it comes to wall panelling, this consistency is why MDF has become such a popular choice. You don’t have to worry about a random knot disrupting your pattern or an uneven surface making painting difficult. The MDF panel provides a perfect blank canvas, allowing you to create a sleek, sophisticated look with clean lines and sharp details.
This reliability is why businesses that need to manufacture hundreds of identical pieces prefer MDF. They get the same predictable result from every single panel. For the homeowner, this means you can achieve a professional-grade finish for your wall panelling project without the unpredictability and high cost of many other many materials.
How Does MDF Wall Paneling Compare to Solid Wood Panels?
When considering wall panelling, the classic choice that often comes to mind is solid wood. While beautiful, solid wood panels come with their own set of challenges and a significantly higher price tag. Understanding the differences will help you determine if an MDF wall is the better option for your project.
Solid wood is prized for its natural beauty and strength. Each panel has a unique grain pattern, which can be enhanced with stains and oils. However, this same natural quality makes it susceptible to changes in temperature and humidity. Solid wood expands and contracts, which can cause it to warp, cup, or even crack over time, especially in large panels used for wall applications. It’s also much more expensive and can be more difficult to work with, especially for a DIY project.
This is where MDF panels truly shine. Because it’s an engineered product, MDF offers superior dimensional stability. It won’t move or warp like solid wood, ensuring your wall panelling remains flat and the joints stay tight for years to come. Furthermore, the smooth, pre-sanded surface of MDF is primed and ready for paint, allowing you to achieve a flawless, uniform color that’s difficult to get on grainy wood. While you lose the natural wood grain, you gain immense versatility in finishing, perfect for creating a clean, modern look or a classic, painted style. For most interior applications where a painted finish is desired, MDF provides a more stable and cost-effective solution than solid wood.
What are the Pros and Cons of Using MDF for Wall Panels?
Like any material, MDF has its strengths and weaknesses. Being transparent about these helps you make an informed decision and ensures you use the material in a way that works best. Here’s a straightforward breakdown of the pros and cons of using mdf for wall panelling.
| Pros of MDF Wall Panels | Cons of MDF Wall Panels |
|---|---|
| Cost-Effective: Significantly more budget-friendly than solid wood or even high-grade plywood. | Susceptible to Moisture: Standard MDF can swell and degrade if exposed to water. |
| Smooth Surface: The perfectly smooth finish provides an ideal canvas for painting. | Heavier than Wood: MDF is a dense material and can be quite heavy, making large panels difficult to handle alone. |
| Stability: Resists warping and cracking, ensuring a long-lasting, stable installation. | Lower Durability: Not as impact-resistant as hardwood. It can dent or scratch in high-traffic areas. |
| Versatility: Can be easily cut, machined, and shaped into various decorative styles. | Dust Production: Cutting MDF creates very fine dust, requiring good ventilation and a mask. |
| Easy to Install: The consistency of the panel makes cutting and fitting straightforward for DIY projects. | Doesn’t Hold Screws as Well: Requires pilot holes and may not hold screws as tenaciously as solid wood. |
For most decorative interior wall panelling applications, the pros far outweigh the cons. The material holds up well when properly installed and finished, providing a high-end look without the high-end price tag. It’s about choosing the right panel for the right space.
How Do You Choose the Right Type of MDF for Your Interior Space?
Not all MDF is the same, and it’s crucial to choose the right panel for your specific project. When I consult with clients, we discuss the end-use in detail to match them with the perfect product. For general wall panelling in living rooms, bedrooms, or hallways, a standard-grade MDF panel is perfectly suitable. These panels offer the classic smooth surface and stability that MDF is known for and are the most cost-effective option.
You should also consider the thickness of the panel. For a simple board-and-batten style, you might use a thinner 6mm or 9mm panel for the strips over a drywall surface. For a full MDF wall with V-grooves or a shaker style, a thicker 12mm or 18mm panel will provide more depth and a more substantial feel. The thickness you choose will impact the overall aesthetic and the perceived quality of the installation.
Ultimately, the goal is to select an MDF panel that meets the demands of the interior environment. A quality supplier will be able to provide you with different grades and thicknesses. For example, our custom raw plain MDF boards can be produced to specific dimensions, minimizing waste and ensuring the material is perfectly tailored to the project, whether it’s a small feature wall or a large commercial space. Making the right choice at the start is key to a successful project.
Is Moisture-Resistant MDF Necessary for a Kitchen or Bathroom Wall?
This is a critical question. The biggest weakness of standard MDF is its vulnerability to moisture. If a standard MDF panel gets wet, the wood fibres will absorb the water and swell, permanently damaging the board. This makes it completely unsuitable for high-moisture areas. So, if you’re planning wall panelling in a bathroom, kitchen, laundry room, or even a damp basement, you absolutely must use a specialized type of MDF.
This is where Moisture-Resistant MDF (often called MR MDF) comes in. We manufacture this panel using a special, moisture-repellent resin. This prevents the MDF from absorbing ambient moisture and occasional splashes. Compared to standard MDF, it offers significantly better performance in humid environments. It is often identifiable by a green dye integrated into the panel, though this is just for identification and does not provide the water resistance itself.
Even when using moisture-resistant mdf, it is vital that the panel is sealed properly on all sides—front, back, and all cut edges—with a quality oil-based primer before installation. This provides a final barrier of protection. While MR MDF is not fully waterproof (you wouldn’t use it to line a shower), it is the perfect choice for wall applications in a kitchen or bathroom where humidity and splashes are expected. It gives you the design flexibility of MDF without the risk of water damage.

What Design Possibilities Does MDF Wall Panelling Offer?
The versatility of MDF is where it truly excites designers and DIY enthusiasts. Because it has no grain and a uniform density, it can be cut and shaped into virtually any design imaginable, allowing you to customize your space perfectly. The possibilities for mdf wall panelling are nearly endless.
Here are just a few popular styles you can create with MDF panels:
- Board and Batten: A timeless, rustic-yet-refined look created by applying a grid of thin MDF strips over a flat wall or a base MDF panel.
- Shaker Style: Characterized by simple, clean lines, this involves creating recessed panels using stiles (vertical pieces) and rails (horizontal pieces) of MDF. It’s a popular choice for a classic, understated look.
- V-Groove or Shiplap: This style mimics traditional tongue-and-groove wall panelling. You can buy pre-routed MDF panels or create the grooves yourself with a router to achieve a coastal or country aesthetic.
- Geometric Designs: Create a stunning, modern look with intricate patterns of triangles, squares, or abstract shapes. The precision with which you can cut MDF makes it perfect for these complex designs.
- Flat Panel with Moulding: Use large, smooth MDF panels to cover a wall and then apply decorative moulding to create elegant, traditional frames, similar to classic wainscoting.
Because MDF is so easy to work with, it empowers you to create a stylish and bespoke feature that can completely transform an interior room, from a grand entryway to a cozy bedroom.
How Do You Properly Prepare an MDF Panel for Installation?
Proper preparation is the key to a professional-looking and long-lasting MDF wall installation. Rushing this stage can lead to problems down the line. The first, and most important, step is acclimatization. MDF panels should be brought into the room where they will be installed and left to sit for at least 48-72 hours. This allows the moisture content of the panel to adjust to the ambient humidity of the space, preventing any expansion or contraction after you install it.
The next crucial step is priming. Before you even cut the first panel, it’s highly recommended to apply a coat of high-quality, solvent-based primer to the entire MDF panel—front, back, and all four factory edges. Why the back? Because the unsealed back of the panel can still absorb moisture from the wall, which could cause subtle movement. Priming all surfaces helps to seal the panel completely, making it much more stable and durable.
This pre-priming step also makes the final painting and finishing much easier. It creates a uniform base coat that will help the paint adhere better and provide a richer, more even color. It might seem like an extra step, but this preparation will ensure your MDF wall panelling looks great and stands the test of time.
What is the Best Way to Install MDF Wall Panels for a DIY Project?
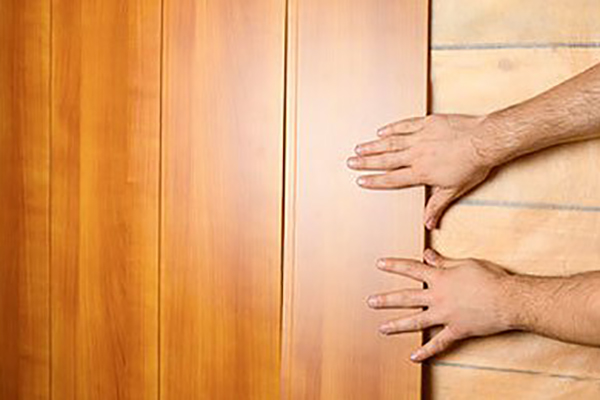
One of the great things about MDF panels is that they are relatively easy to install, making them a fantastic choice for a DIY project. With careful measurement and the right tools, any competent homeowner can achieve a professional result. The general installation process involves a combination of adhesive and nails to secure the panel firmly to the wall.
Here’s a simplified step-by-step guide:
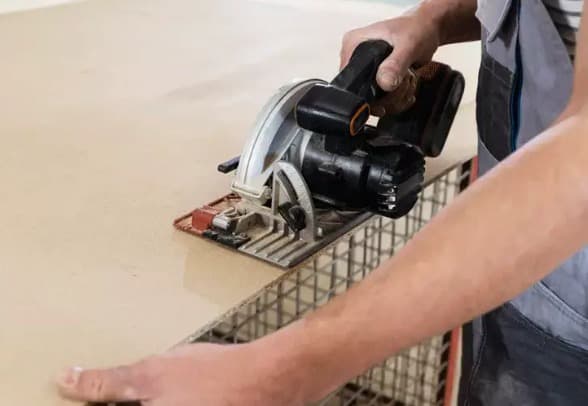
- Measure and Cut: Measure your wall space carefully and transfer the measurements to your acclimatized and primed MDF panel. Use a circular saw with a fine-toothed blade for clean, straight cuts. Always wear a mask and safety glasses.
- Locate Studs: Use a stud finder to locate and mark the wall studs. This is where you will nail the panels for the most secure hold.
- Apply Adhesive: Apply a generous amount of construction adhesive to the back of the MDF panel in a serpentine or "S" pattern. This ensures good contact and prevents the panel from bowing.
- Position and Fasten: Press the panel firmly against the wall. Use a level to ensure it is perfectly straight. Secure the panel by driving finish nails through the MDF and into the wall studs you marked earlier. A pneumatic brad nailer makes this job quick and easy.
- Finish the Seams: Fill all nail holes and any seams between panels with wood filler. Once dry, sand the filler smooth so it’s invisible after painting. Caulk along the top and bottom edges where the panelling meets the ceiling and baseboards for a clean, integrated look.
This straightforward installation method makes creating a beautiful MDF wall an achievable weekend project that can dramatically elevate the look of your space.
How Can You Achieve a Flawless, Smooth Finish on MDF Wall Panels?
The ultimate goal of installing MDF wall panelling is to achieve a beautiful, uniform finish that looks like it was done by a professional. The secret to this lies in the final painting and finishing steps. Since MDF has a porous nature, especially on its cut edges, simply applying paint directly will result in a blotchy, uneven surface.
If you followed the preparation advice and primed your MDF panels before installation, you’re already halfway there. After installation and filling all the nail holes, the next step is to apply another coat of primer. This coat unifies the surface, covering the wood filler and any small scuffs from the installation. Pay special attention to any cut edges that are exposed, as they are extra absorbent.
Once the final primer coat is dry, give the entire surface a very light sanding with fine-grit sandpaper (220-grit or higher). This will knock down any tiny imperfections and create a slightly "toothy" surface for the topcoat to grab onto. Wipe away all the dust with a tack cloth. Now, you’re ready for paint. Apply two to three thin coats of your chosen paint, allowing adequate drying time between each coat. Using a high-quality roller or a paint sprayer will give you the most professional, smooth finish. This meticulous process is what creates that premium, flawless look that makes MDF wall panels so desirable. Many customers who buy our white two-sides melamine MDF boards do so to skip some of these finishing steps, as the surface is already finished and durable.
Why is MDF a Cost-Effective and Sustainable Choice for Home Interior Design?
In today’s world, project decisions often come down to two key factors: budget and environmental impact. MDF scores exceptionally well on both fronts, making it a smart and responsible choice for wall decoration in your home interior.
From a financial perspective, MDF is a clear winner. It is significantly more affordable than solid wood, and often cheaper than high-quality plywood. This cost-effective nature allows you to achieve a high-impact design feature, like a full feature wall, without breaking the bank. Because it’s easy to install, you can also save a considerable amount of money on labor if you choose to make it a DIY project. This accessibility makes sophisticated design available to a wider range of homeowners and designers.
From an environmental standpoint, MDF is a sustainable product. As mentioned, it is made by breaking down and using wood residuals—the chips, sawdust, and shavings left over from other manufacturing processes. This means we are utilizing parts of the tree that might otherwise be discarded, leading to less waste and a more efficient use of our forestry resources. Many MDF manufacturers, including ourselves, are committed to sourcing fibers from responsibly managed forests, further enhancing the material’s green credentials. This combination of being lightweight on your wallet and kind to the planet makes MDF panels a truly modern material for indoor design.
Key Takeaways for Using MDF Wall Panelling
- MDF is a Smart Choice: It’s a stable, cost-effective, and versatile engineered wood product with a perfectly smooth surface ideal for painted wall panelling.
- Choose the Right Type: Use standard MDF for most interior spaces, but always opt for Moisture-Resistant (MR) MDF for bathrooms, kitchens, or any area prone to dampness.
- Preparation is Everything: Always allow MDF panels to acclimatize to the room for 48-72 hours before installation to prevent movement.
- Prime, Prime, Prime: For maximum durability and a flawless finish, seal all surfaces of the MDF panel (front, back, and edges) with a quality primer before installation and again before painting.
- Design Freedom: The versatility of MDF allows for endless design possibilities, from classic board and batten to modern geometric patterns.
- Proper Installation is Key: Use a combination of construction adhesive and nails driven into wall studs for a secure, long-lasting installation.
Post time: 09-11-2025