As a manufacturer of wood-based panels, my world revolves around materials like Medium-Density Fiberboard (MDF). My name is Allen, and from my factory in China, I oversee the production of countless sheets of MDF that are shipped to professionals like Mark Thompson in the USA. Mark, who owns a furniture manufacturing business, knows that MDF is an incredible substrate. Its perfectly smooth, grain-free surface makes it ideal for a painted finish. However, he also knows its one major weakness: its edges are porous and thirsty, soaking up paint and ruining an otherwise perfect job. This is the central challenge of working with MDF. The good news is that with the right method and a little patience, you can achieve a finish so smooth and durable it looks like it came from a high-end factory. This guide will provide you with the definitive, step-by-step method to prepare, seal, prime, and paint MDF for a flawless result every time.
Why is Preparing the MDF Surface the Most Critical First Step?
In woodworking and finishing, a common saying is that 90% of the work is in the preparation. This has never been more true than when you paint MDF. While the face of a raw MDF sheet feels incredibly smooth, it’s not ready for paint straight from the supplier. The surface can have a slight residue from the manufacturing process, and more importantly, cutting the MDF creates fine dust that clings to the board. Attempting to paint over this will result in a gritty, uneven texture and poor adhesion.
The first step is a very light sanding. You are not trying to remove material or flatten the board; you are simply scuffing the surface to give the primer something to grip. Use a fine-grit sandpaper (220-grit is perfect) and gently go over the entire surface you plan to paint. The most crucial safety precaution here is to wear a mask. The dust from MDF is extremely fine and should not be inhaled. After sanding, the board will be covered in a layer of fine powder. Thoroughly vacuum the surface, and then wipe it down with a tack cloth or a slightly damp microfiber cloth to remove every last particle. Your MDF should be perfectly clean and dry before you even think about opening a can of primer or paint.
What is the Best Method to Seal the Porous Edges of MDF?
If you take one thing away from this guide, let it be this: you must seal the cut edges of MDF before painting. A cut edge exposes the end-grain of the millions of tiny wood fibers that make up the board. This structure acts like a bundle of microscopic straws, and it will absorb the moisture from your primer and paint, causing the fibers to swell and creating a fuzzy, rough texture. No amount of sanding the paint later will fix this properly. You must solve the problem before the primer is applied.
There are two highly effective and common methods to seal the MDF. The first, and my personal favorite for its simplicity, is the glue method. You can use standard PVA wood glue, either straight from the bottle or thinned slightly with water to make it easier to spread. Apply a thin coat of the glue evenly across the edge with your finger or a small brush. As it dries, the glue will create a non-porous plastic film. Once completely dry, lightly sand the edge with 220-grit sandpaper until it’s perfectly smooth.
The second method is to use a light spackling compound or wood filler. Skim a very thin coat over the edge, pressing it into the porous surface with a putty knife. Again, allow it to dry fully and then sand it smooth. Both techniques accomplish the same goal: they create a hard, sealed edge that will accept primer and paint just like the face of the board, giving you a sharp, uniform appearance.
Which Primer Should You Choose to Paint MDF Effectively?
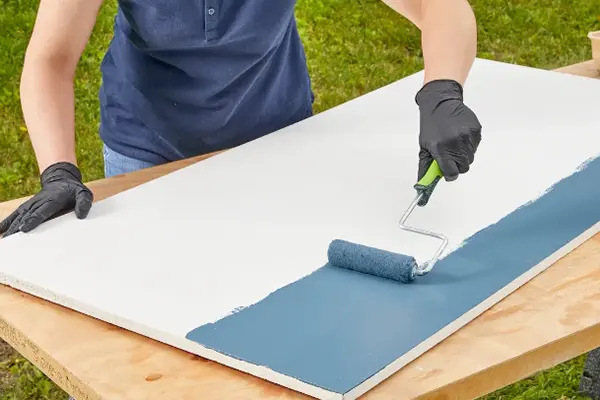
With the surface clean and the edges sealed, it’s time to prime. Do not skip this step. A primer is not just a base coat of paint; it’s a specific formulation designed to do three things: seal the entire surface, prevent the topcoat from being absorbed, and provide a uniform base that the paint can adhere to strongly. Using the correct primer is essential for a durable, long-lasting finish.
For MDF, a solvent-based primer is almost always the best choice. This includes oil-based or shellac-based primers. The reason is that solvents don’t contain water, so there is zero risk of them raising the wood fibers on the surface of the MDF and causing it to swell. They provide an excellent seal and create a very tough, sandable base for your paint. Shellac-based primer, in particular, is fantastic because it dries very quickly.
While you can use a high-quality water-based primer, there is a slight risk of fiber swelling. If you go this route, apply a very thin first coat—sometimes called a mist coat—and let it dry completely. This will raise any loose fibers, which you can then knock down with a light sanding before applying a second, fuller coat of primer. Regardless of the type, choose a primer that is specifically recommended for wood or cabinetry for the best result.
Step-by-Step: The 4 Steps to Apply Paint for a Flawless Finish
We’ve done the critical prep work, and now we’re ready for the main event. Achieving a professional paint finish is about building up thin, even layers. Trying to get the job done with one thick coat will only lead to drips, an uneven sheen, and a long drying time. Follow these 4 steps for success.
- Step 1: Final Prep. Double-check that your sealed edges are smooth and the entire surface is clean and dust-free. Use a tack cloth one last time to be sure.
- Step 2: Apply the Primer. Using a high-density foam roller for the flat surfaces and a quality brush for any details, apply a thin, even coat of your chosen primer. Don’t try to get full coverage on the first pass. Let it dry completely according to the manufacturer’s instructions. Once dry, sand the entire piece very lightly with 220-grit sandpaper and wipe away the dust. For a truly premium finish, apply a coat of primer a second time and repeat the sanding process.
- Step 3: Apply the First Coat of Paint. Now, apply your first coat of paint. Use the same technique: a foam roller for flat areas and a brush for details. Keep your coats thin and even. The goal is to get a uniform layer of color down. This first coat will likely not look perfect, and that’s okay.
- Step 4: Apply the Final Coat. Let the first coat of paint dry completely—this is crucial. Rushing this will ruin the finish. Once it’s fully cured (check the can for times), give it a final, extremely light sanding with a very fine grit (320 or higher). This is more of a polishing action to remove any tiny imperfections. Clean off the dust, and then apply your final, beautiful top coat of paint. Let it cure fully in a dust-free area.
How Do You Achieve a High-Gloss Finish on Painted MDF?
A high-gloss or lacquer-like finish is the pinnacle of painted MDF, often seen on modern kitchen cabinets and high-end furniture. This finish is beautiful but unforgiving, as the reflective surface will highlight every single flaw. Achieving this look is an extension of the 4-step process, but with an intense focus on building up layers and sanding between them.
The secret to a mirror-like gloss finish is a perfectly flat substrate. This means that after priming, you need to sand the primer until the surface feels as smooth as glass. When you start applying your paint, you will need more than two coats—likely three or four. Each coat must be extremely thin. After each coat is fully dry, you must sand it with progressively finer grits of sandpaper—moving from 320-grit up to 600-grit or even higher. This process removes any tiny "orange peel" texture from the roller and creates a progressively smoother surface.
For the final application, many professionals will switch to a paint sprayer to eliminate any chance of brush or roller marks. After the final coat of paint has cured for several days, it can be buffed and polished with automotive compounds to bring out the final, brilliant gloss. It’s a labor-intensive process, but the stunning result is worth it.
Can You Use Wood Filler on MDF Before Painting?
Yes, absolutely. Wood filler is an essential tool in the MDF finishing toolkit. Because MDF is a relatively soft material, it can sometimes get dented or scratched during handling or assembly. Furthermore, if you are building furniture and using screws, you will need a way to hide the screw heads for a clean appearance.
A good quality, paintable wood filler is perfect for this. Use a putty knife to apply the filler to any holes or imperfections, slightly overfilling them to account for shrinkage as it dries. Once the wood filler is completely dry, sand it down until it is perfectly flush and smooth with the surrounding MDF surface. If the fill is deep, you may need to apply a second skim coat. Once sanded, the filled spot will be invisible after you prime and paint the board. This simple repair technique is key to making your project look flawless. When we supply our E1 Glue HDF PLAIN MDF BOARD, we know our clients rely on techniques like this to turn those panels into finished goods.
What is the Difference Between a Sealer, Glue, and Primer?
The terms sealer, glue, and primer are often used in the context of preparing MDF, and it can be confusing. While they can sometimes serve similar functions, they are fundamentally different products. Here’s a quick comparison to clarify their roles.
- Sealer: A sealer is a product (often a clear coat like shellac or sanding sealer) specifically designed to seal a porous surface. Its only job is to sink into the wood fibers and harden, creating a non-absorbent barrier. It stops the surface from drinking up subsequent coats.
- Glue (PVA): When we talk about using glue, we are using it as a homemade sealer for the cut edges. A thin layer of wood glue dries into a hard, non-porous film that effectively seals the most absorbent part of the MDF board. It’s a very effective and inexpensive method.
- Primer: A primer is the essential bridge between the sealed surface and the paint. While it does have sealing properties, its main purpose is to provide a uniform color and a slightly matte texture that the paint can mechanically bond to. It ensures the final paint color is true and that the finish will be durable. You can use a sealer first and then a primer, or you can use a high-quality "primer-sealer" that does both jobs. But you always need to prime before you paint.
What Tools Do You Need for a Professional MDF Paint Job?
Having the right tool for the job makes the process easier and ensures a better finish. You don’t need a professional spray booth, but a few key items will make a world of difference.
Essential Toolkit for Painting MDF:
- Safety Gear: A high-quality mask for dust and fumes, safety glasses, and nitrile gloves.
- Sanding Supplies: A sanding block and several grits of sandpaper (120 for shaping filler, 220 for general prep, 320+ for finishing between paint coats).
- Cleaning: A vacuum with a brush attachment and several tack cloths.
- Applicators:
- High-Density Foam Roller: This is the secret to a streak-free finish on flat surfaces. Avoid fuzzy rollers, which will leave a "hairy" texture.
- High-Quality Synthetic Brush: A good quality angled brush is needed for cutting in at corners and on any detailed trim.
- Paint Tray and liners.
- Materials:
- Wood Filler: For any repairs.
- Edge Sealant: PVA glue or spackling.
- Primer: A solvent-based (oil or shellac) primer is ideal.
- Paint: Your chosen color in a quality formulation (e.g., acrylic enamel).
- Top Coat (Optional): A clear protective coat like Polycrylic or polyurethane varnish.
How Many Coats of Paint Does MDF Really Need?
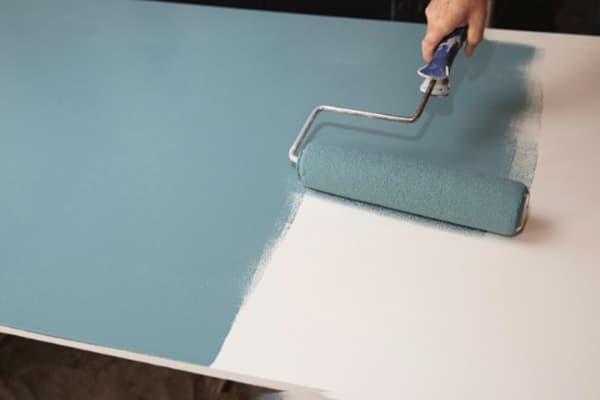
The simple answer is: more than one. A professional finish is built in layers. Attempting to get full coverage with a single, thick coat of paint is a recipe for a poor-quality, uneven finish that will not be durable.
Here is the standard, reliable formula for a great MDF paint job:
- Primer: 1-2 Coats. One good coat of a solvent-based primer is often sufficient after the edges are sealed. However, for the absolute best result and a completely uniform base, a second coat of primer, with a light sanding in between, is the professional standard.
- Paint: 2 Coats Minimum. The first coat of paint provides the color, but it may still look slightly uneven or translucent in spots. The second coat is what builds the color depth and creates a rich, solid appearance. For some light colors (like whites and yellows), you may even need a third thin coat to achieve a perfectly opaque finish. The key is to let each coat dry completely before applying the next.
Rushing the process and not allowing adequate drying time is one of the biggest mistakes people make when they paint MDF. Patience is a critical part of the technique.
What are the Final Top Coat Options for Durability and Appearance?
For many projects, a high-quality acrylic enamel paint is durable enough on its own. However, for high-wear surfaces like a tabletop, shelving, or a cabinet door, applying a clear top coat is highly recommended. A top coat is a transparent protective layer that shields the paint from scratches, scuffs, and moisture, dramatically increasing the durability of your finish.
Here are your main options:
- Polycrylic: This is a water-based clear coat. Its main advantage is that it is crystal clear and will not yellow over time, making it perfect for protecting light or white painted surfaces. It is durable and easy to clean up with water.
- Polyurethane: Available in both water-based and oil-based formulas, polyurethane is a highly durable varnish. The oil-based version is slightly tougher but can impart a slight amber hue, which may not be desirable over pure white paint. It’s an excellent choice for surfaces that will see a lot of use.
- Lacquer: For the hardest and most professional finish, lacquer is the way to go. It is typically sprayed on and melts into the previous coat, creating a single, seamless layer of protection. It can be buffed to a very high gloss.
The choice of top coat will affect the final appearance, as they are available in sheens from matte to high-gloss. Applying a top coat is the final step in ensuring your beautifully painted MDF project lasts for years to come. It’s the same principle we apply when creating our durable raw MDF boards; the quality of the base material is only as good as the finish that protects it.
Key Takeaways for a Perfect MDF Paint Finish
- Preparation is Everything: The quality of your final finish is determined before you even open the paint. Always start by lightly sanding and thoroughly cleaning your MDF surface.
- Seal the Edges—No Exceptions: The porous cut edges of MDF must be sealed with wood glue or filler and then sanded smooth. This is the most critical step for a professional look.
- Use a Solvent-Based Primer: An oil-based or shellac-based primer is the ideal choice as it provides the best seal and won’t cause the wood fibers to swell.
- Build Thin Coats: Never try to cover in one thick coat. A proper finish is built with multiple thin coats of primer and paint, with light sanding between each dry layer.
- Choose the Right Tools: A high-density foam roller and a quality synthetic brush are your best friends for achieving a smooth, streak-free surface.
- Consider a Top Coat for Durability: For high-traffic items like furniture and cabinets, protect your paint job with a clear top coat like polycrylic or polyurethane.
Post time: 09-18-2025